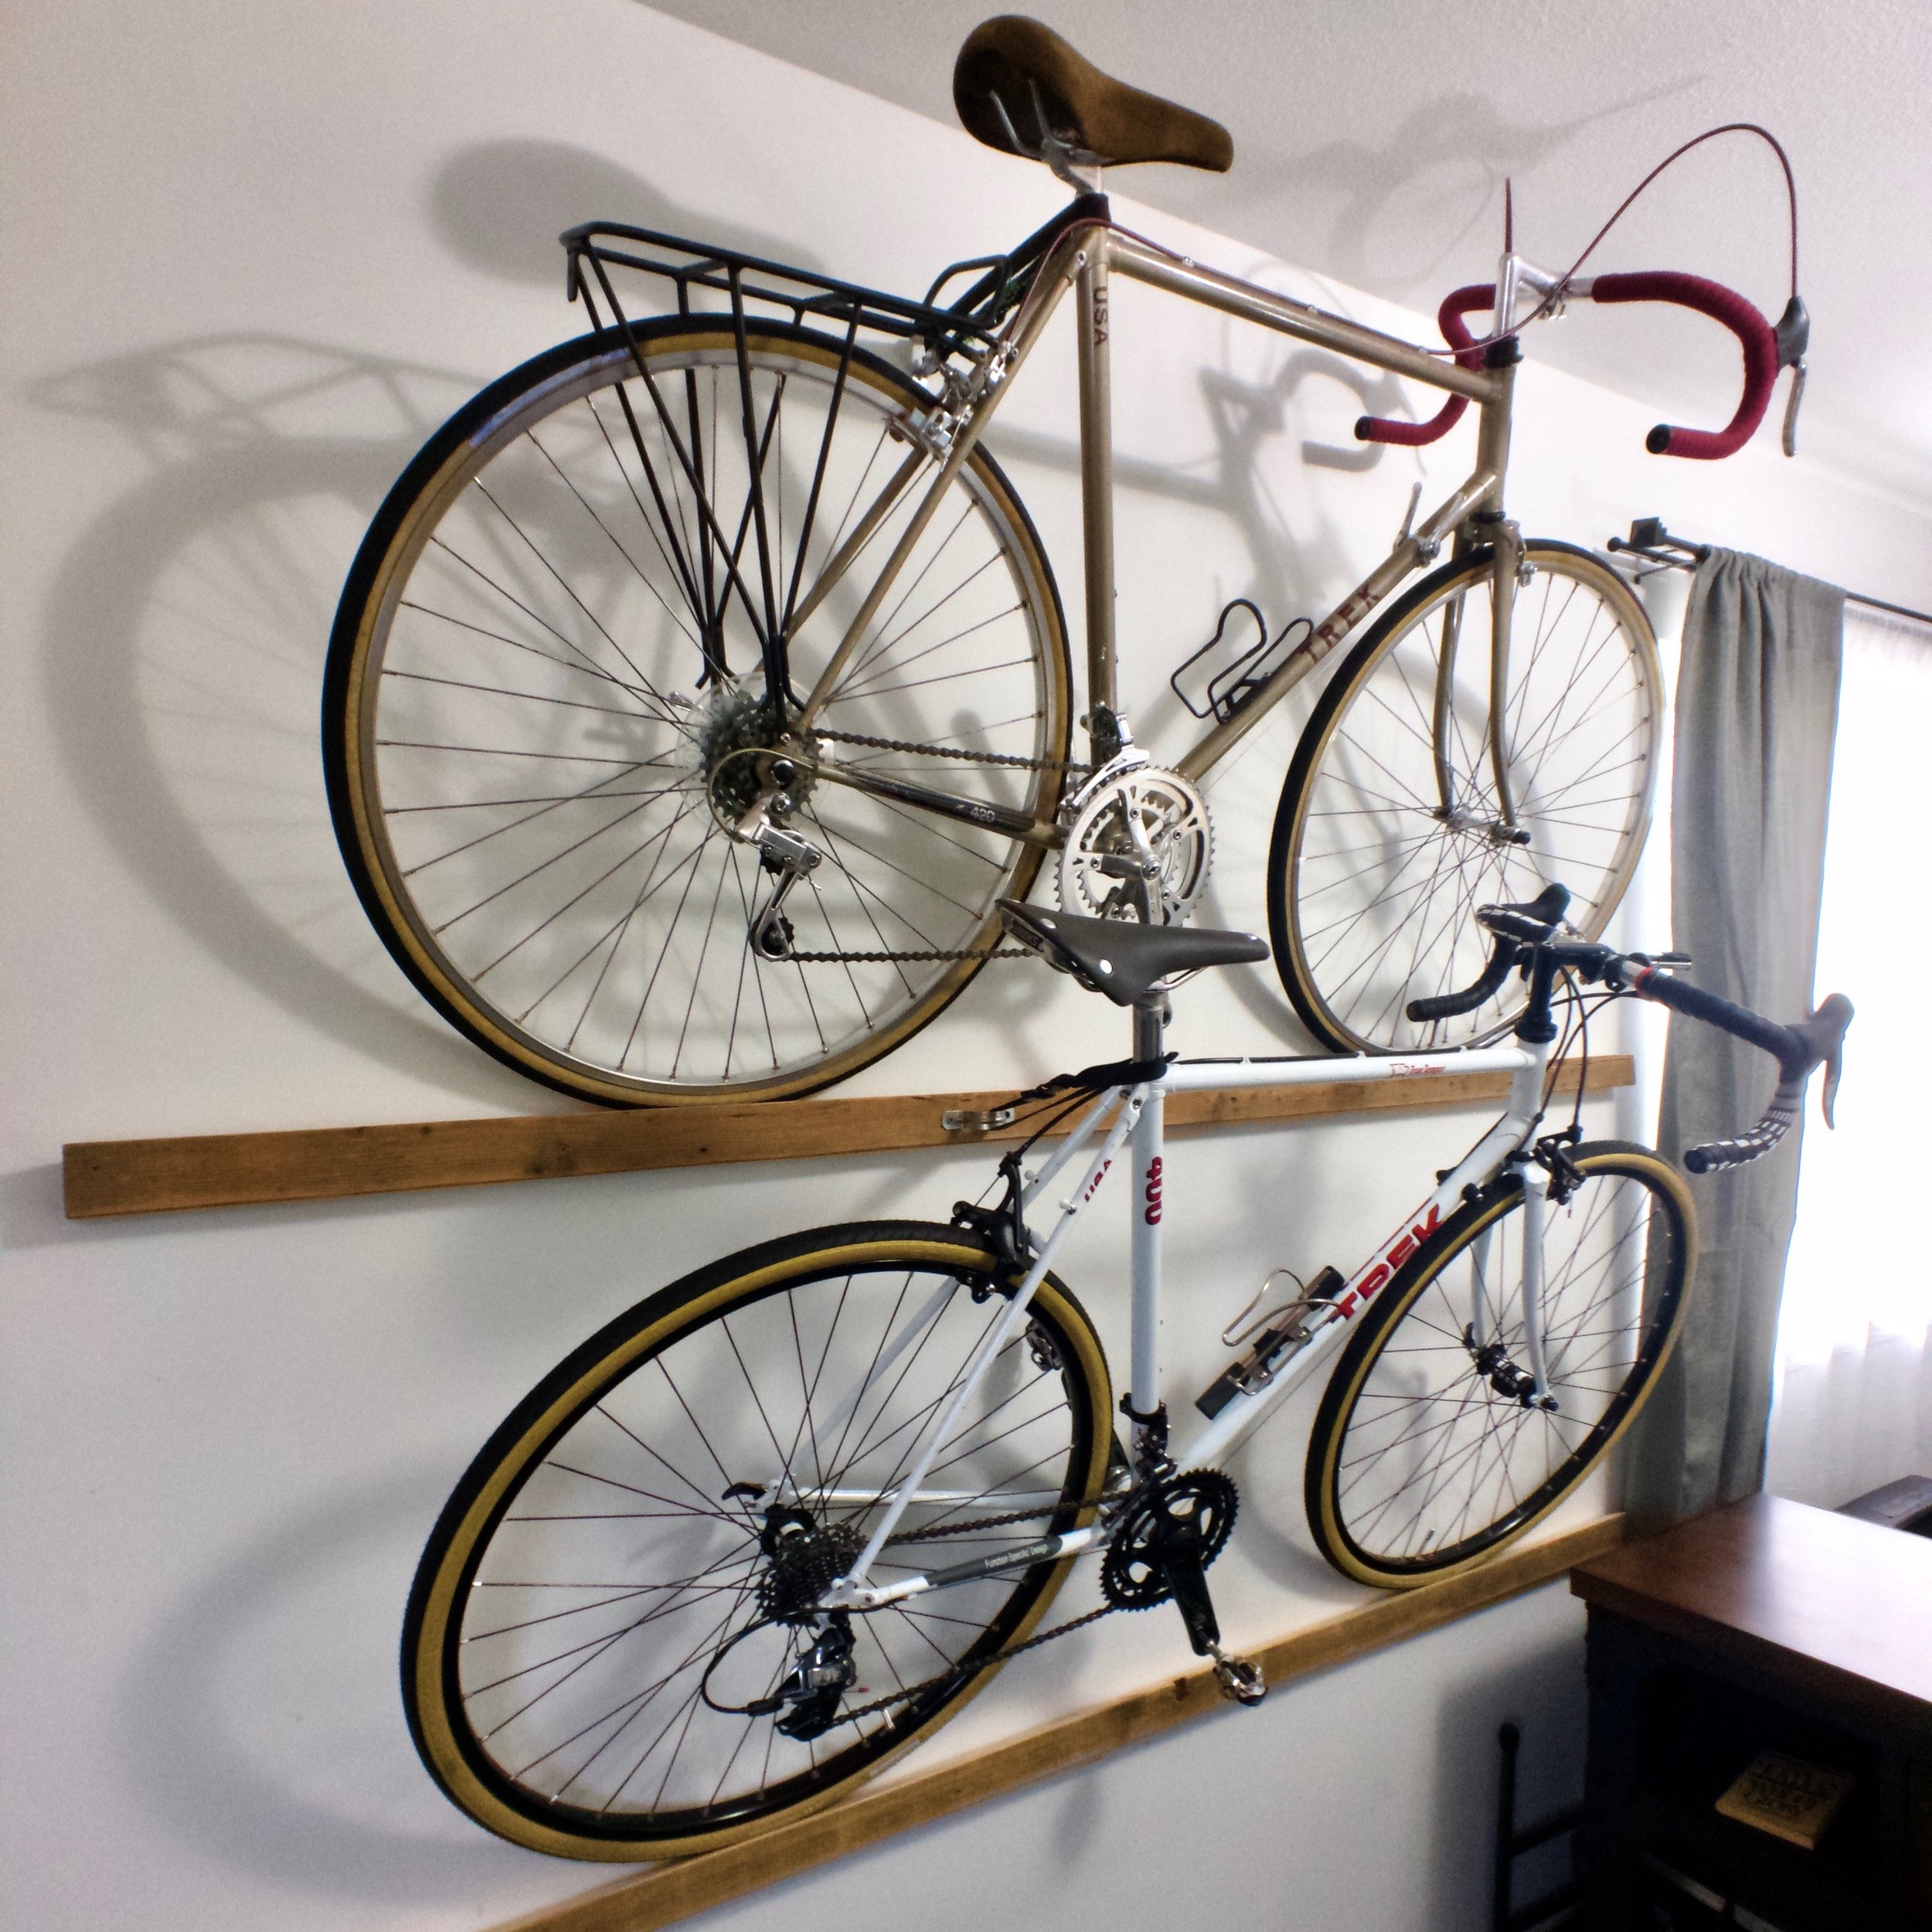
DIY Bicycle Wall Mount
Parts List:
1x - 2”x 4” wood beam
1x - 1in. Conduit Strap
1x - bag strap
4x - 3” Screws
2x 1” Screws
Tools Needed:
Table Saw
Drill
Circular or hand saw
Sander or sandpaper
Phillips head or EQUIVALENT bit
Drill bits
Cost: $0-$20
If you own bikes chances are you’ve seen and used quite a few different storage solutions - and there are a lot of great ones out there. For me though, it was always hard to find one that fit my needs exactly. My wish list was it needed to be simple, sturdy, affordable, and give ample room surrounding the bikes. After mulling over different ideas, I decided on making this one. It’s not perfect and won’t fit everyone's needs, but it works great for me and cost $0 to make. I’ve had a couple people ask me about how I built it so I’m outlining my general process below.
The Build
The design is quite simple and consists of one 2x4 beam, conduit strap, a rope or bag strap, and some screws. Most of these parts you may already have on hand but if not you can find them for cheap or even free. The biggest ingredient for this rack though is not in the materials but the tools. You will need a table saw, circular or hand saw, drill and sander to complete this build. If you don't' already have access to these tools try cashing in a favor with a friend, or maybe bribe a neighbor with pizza and drinks. Either way, if you’re still with me thus far awesome, let’s get into it.
With any good project it all comes down to the measurements, and this one is no different. First, you will need to access your bike and measure its length and height. These measurements will vary slightly from bike to bike so I won’t get into any specifics. Once you have those numbers, find an area on your wall that will accommodate the bike and locate the studs. Once you have your area marked out, it’s time to pull out the power tools. First, you will need to cut the 2x4 to length with a circular or hand saw. You want to cut it no shorter than about 5ft. If you have room leave it a bit longer. This gives you a little more adjustability in the bikes positioning. Second, and this is optional, rip about 1 inch off the front of the 2x4 -the 3”1/2 inch side. I think this gives the board a smaller, more streamlined profile on the wall. The third and most important step is the angle. This is where the magic happens by allowing the tires to wedge against the wall holding the bike firmly in place. You want to angle your blade to 25 degrees for this cut. Once you are done with your cuts you can move onto the installation.
Installation
Installation, for the most part, is pretty straight forward. First, mockup your board on the wall and mark out your studs. Then drill your mounting holes in the board. Make sure these holes are big enough so the screw shaft passes through easily but not the screw-head. You could screw into the beam without holes, but it makes it much more secure if you drill it out. Once leveled and secured to the wall, test fit the bike and find a good location for the conduit strap. I positioned mine so I could put a strap around the seat post, but the top tube would work as well. I would suggest going into a stud for the conduit strap. If that isn’t possible though, heavy-duty mollies should do the trick. And with that, install the bike, wrap a rope or strap around the seat post or top tube and you’re done!
Thoughts & Considerations
The nice thing about using an adjustable strap to hold the bike is you can adjust the bikes angle to the wall. For instance, I removed the pedals on the top bike in my setup so I could bring it closer to the wall. It’s not an everyday driver so I decided on saving space over ease of use. If you have a bike with wide petals and or handlebars, just increase your angle with the strap to clear the wall. Also, having a quick release buckle on the straps make removing and installing the bike a breeze.
This design works best with road bikes and narrow tires. Bike tires wider than 35mm won’t work.
This is NOT an earthquake-proof rack, and when living in the Pacific Northwest that is a real concern. It’s a problem I’m still working on to find the best solution.
If you have any questions or comments about this rack design or anything else on my blog feel free to contact me here. Cheers and happy building!


